It can be costly to build your own home. But, what if we told you that it can be done for less than $4000? This article is meant to inspire you to build a livable shelter that you and your family can enjoy. We were impressed with the work Steve Maxwell has done on this cabin and decided it was worthy of being featured on our page. If you are willing and able to put in your time and effort, you can build a cabin yourself.
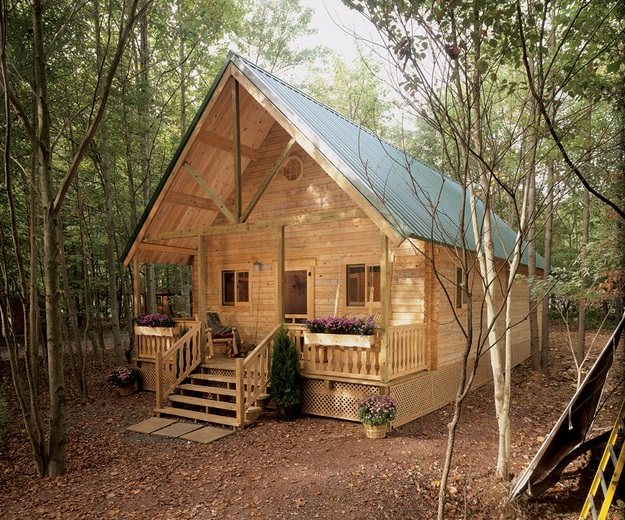
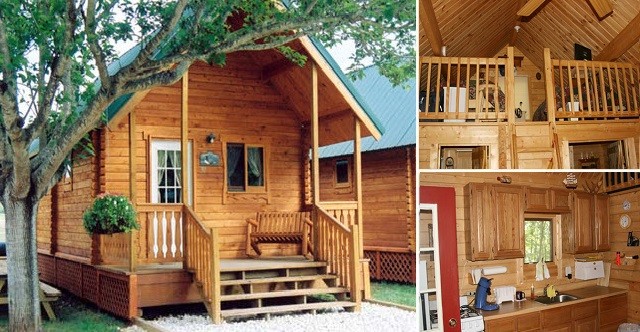
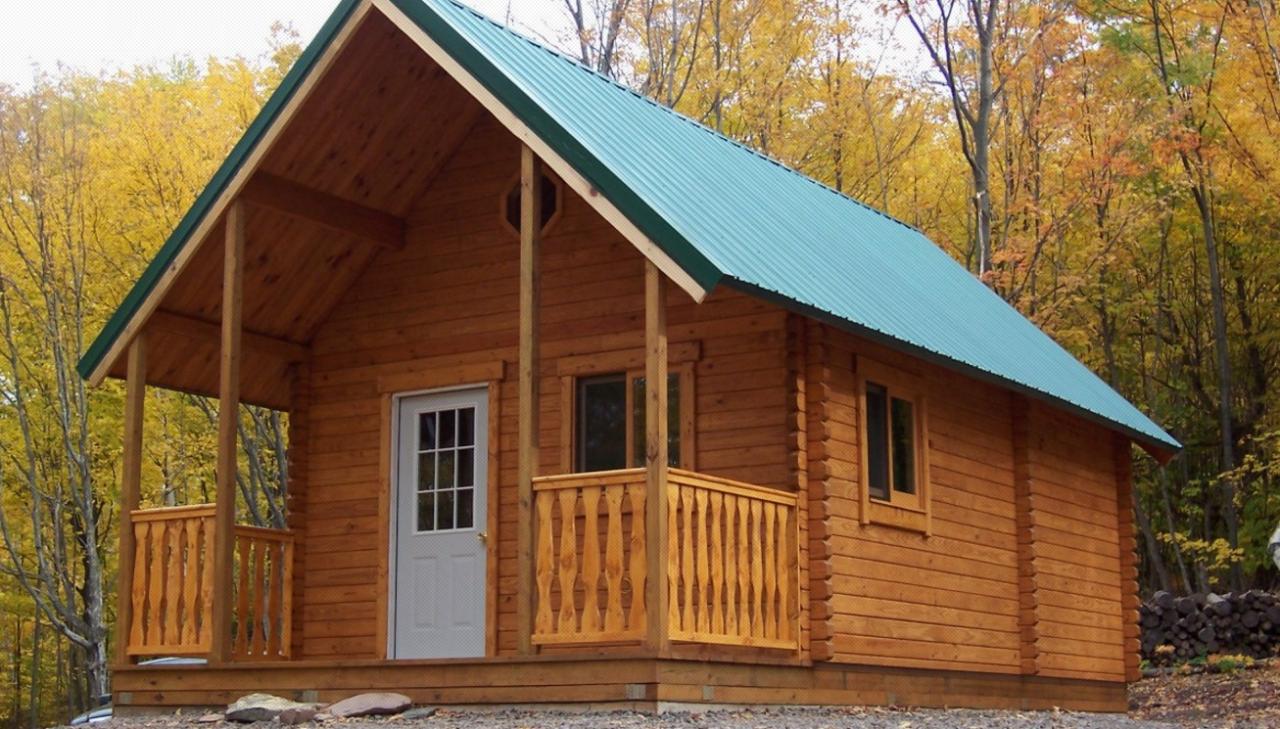
This cabin measures 14 x 20, and has one bedroom. If you have basic carpentry knowledge, this cabin is a great choice. The windows in this cabin will allow you to enjoy the sunrise as it hits your bedroom. Downstairs, you’ll find everything you need, including a pine stove, a wood stove, and a compact kitchen that can be used for your daily meals.
First, you’ll need to plan your cabin. You will need to learn all that you can about building it for the long-term. For your project to last, you need to be aware of the standards for beauty and durability. You can’t do enough with your resources.
Before you begin this project, you should consider the weather and the location of the building site.
The early morning sun gently shines through the windows to ease you into sleep. You can see everything from the sleeping loft: a pine table, a box with hardwood, split, and ready for the woodstove, and a small kitchen in the corner. This is the cabin of your dreams.
This article will show you how to make a cozy cabin measuring 14 by 20 feet with a sleeping loft above the porch. It costs approximately $6,050. This is a great idea!
My own cabin adventure began in 1986, when I built one as an inexpensive place to stay while constructing my house — that’s when I began learning what makes cabin design and construction successful. I have always been able to develop my property without incurring debt. The four years I lived in this cabin were a good time in my life — perhaps one of the best. I still remember the simplicity of waking up each morning with the sole purpose to build my own house. It was a great feeling.
Below is a cabin plan with a complete Cabin Assembly Diagram. It includes the hands-on knowledge I wish I had twenty years ago. While it won’t replace basic carpentry skills but it will help you understand the main challenges and how to overcome them. Even if you have never built a cabin, these basic instructions can be used whenever you need to build a shed, garage, or other outbuilding. (For more information on the author’s cabin experience see Our Life in an One-Room Cabin.
I believe in building for long-term success. This applies to cabins as well as everything else. You must maintain the same standards of beauty and durability that you would for a full-sized house. However, the style, dimensions, and soul of a good cabin may be quite different. Because durability requires very little extra effort, materials, and money, I believe it will last a long time. While a cabin can be framed more robustly than the one I’ll show here, I believe that the best use of resources is often going beyond what’s good enough.
A Firm Foundation
The foundation is the most important part of any well-built structure. Site-poured, 6-by-16-by-16 inch, shallow-depth concrete pads are fine in frost-free areas. This is the same approach that was used to build new houses in your region, so it’s okay for use under your cabin.
Cold climates can be difficult. A good foundation for a cabin is one that can easily be established with minimal tools. Concrete piers below the frostline, poured into round cardboard tubes, offer a time-proven method of lightweight construction with a couple benefits. Concrete piers are a great way to support your cabin around the perimeter without having to form and pour large amounts of concrete.
You will need one pier in each corner of the cabin, one at the middle of each long side, three in the front and one at the rear. With a long-handled shovel, you can dig the 10 holes required for pier forms measuring 8-12 inches in diameter. You can also call in a neighbor with a tractor mounted auger or contractor. You can use 8 inch concrete piers. However, the larger size is more tolerant if the alignment is not perfect.
You can mark your foundation outline with 12-inch spikes that are pushed into the earth and then connected with nylon string. Layout tips are provided in the section “Choose an Earth-solid Start,” below. No matter what foundation design you choose the main challenge of construction is leveling the foundation pads or the piers. A laser level is simple to use and can even be used by an individual to level a foundation. A laser level is not necessary for this project. However, it’s worth borrowing from a neighbor or friend.
Dig holes large enough for side-toside adjustment when putting concrete pier shapes in the ground. The pier forms’ outside edges should be slightly wider than your building’s outer dimensions. To provide inexpensive insurance against frostjacking of foundation pilings (when the piers are pulled towards their surface by seasonal freezing), wrap each pier tube with black plastic and then place them in the holes. The soil should be packed around them. Vertically embed five-eighths-inch L shaped threaded steel rod anchors at least 7 ins above the concrete. These will be used later to hold the base of your floor frame.
Building the Floor Frame
There are many ways to frame your cabin floor. I prefer the timber-rim method for a few reasons. The timber rim is a load-bearing frame made of timbers that forms the perimeter of the floor. It is more stable than a continuous foundation wall and eliminates the need to do a lot of blockwork or pour foundations. It provides continuous support for a building which is held up at 10 points around its perimeter. Timber-rim construction is also durable and easy for first-time cabin builders.
For the outer rim, start by gathering 6-by-6 rot-resistant timbers. The length of the timbers for the porch and cabin ends should be sufficient to complete the job in one piece. You can splice two timbers together to make the 20-foot cabin sides. Simply place the splices on top of your concrete pads and piers. (It is possible to get away with thinner pieces of wood here, but that would require adding more piers — an option that’s probably less attractive than dealing with thicker timbers.) Make sure to attach the rim timbers to the corners using half-lap corner joints.
Measure, mark, and drill 1-inch holes in your 6-by-6s to accommodate the five-eighths-inch threaded anchor rod anchors that you embed in your concrete piers. Then, settle the timbers over the rods.
Before you bolt down the timbers make sure that the top surfaces of your 6-by-6s are at the same level. Concrete pouring can be a tedious job. It is possible that the foundation posts are not exactly the same height after they have hardened. Now is the time for you to identify and fix any errors. Install shims beneath the uneven timbers in order to level them. Then bolt them down securely using 2-inch washers. Finally, use a level to check for any sloppy areas. Now you can begin building your cabin. Natural ventilation will ensure that this structure is strong for many decades as long the timber rim does not touch the soil.
The timber rim that you just installed supports floor headers and floor joists, which are the frame around the joists. These in turn create the porch floor and cabin. You can create a stiff floor by running joists along the 14-foot span of the building. This will minimize squeaks, and ensure long-term durability. A good floor is a 2-by-10 spacing on 16-inch centers throughout the cabin. But because the type of wood affects the total allowable span — building codes may vary where you live — double-check floor joist sizes with your local authority. Consider using 2-by-10 for the porch and 2-by-12s to support the main floor. But if you do use them, make sure to have a 12-inch header for the main flooring. Otherwise your joists may be higher than the floor frame. 2-by-12s can raise the cabin floor, creating a lip at your door that repels water.
No matter what floor framing material you choose, you should use five 3 1/2-inch nails at each joint that connects the floor joists and the headers. You should ensure that the floor frame edges are straight. A string can be used as a guide to make sure this happens. To attach the floor frame and timber rim, use 3 1/2 inch hot-dipped, galvanized nails. Galvanized connector plates can also be used.
You are now ready to apply a floor to your joists. This means that you need to make a decision: Three-fourths inch softwood planks are the best choice if you want flooring that is easy to build, affordable, and will last for years. These planks can be left unfinished and create a rustic, beautiful floor that is easy to sweep clean. This bare wood will become a beautiful, aged beauty that is as pleasing to the eye as it is to live on.
Do you want a floor that is more resistant to drafts and bugs while still retaining simplicity? Consider shiplapped floorboards. Shiplapped floorboards are one step above square-edged planks and offer all the same benefits as plain boards but also prevent board-to-board gaps. Plywood is the best option for a floor. It can be used to cover a finished floor material. Plywood prevents drafts and adds a rigidity that dimensional timber can’t match. However it looks ugly in a cabin.
Wall Framing
Once you have your rough floor, you can begin to build the walls. The most popular method for residential projects is still stud-frame construction. This works well for cabins as well. Even though you can save money framing with 2-by-4s you should opt for 2-by-6s, even if you aren’t insulating. Frames with 2 inches more depth look better, are stronger, and offer greater storage options for small items that are stored between the studs.
Three major parts of Stud-frame walls are: the plates (horizontal member that form the top or bottom of the walls); the studs and lintels (horizontal frame members that span doors and windows); and the studs and studs.
Start by cutting one top and one bottom plate for the rear wall — the one opposite the door. These plates can be made from one 2-by-6 and then temporarily screwed together so that all sides are flush. The accuracy of the marks you make to indicate stud location will be maintained by joining them together. These plates should be 13 feet long and 1 inch in length. When flanked on each side by the two long walls, the front and back walls will measure 14 ft wide.
Use a carpenter’s square to draw lines along the edges of each plate. Each pencil line marks where each stud should go. An “X” indicates the side where the stud should be placed. Studs measuring 92 1/2 in length should be spaced 16in apart from the center point to the center point. There should also be extra studs for door and window openings. Before framing openings for windows or doors, it is important to determine the dimensions of the openings. When you reach that point, make your window openings 12 inch wider than the overall size of your windows (12 inch wider for prehung doors and a half-inch taller for windows).
The screws that held the top and bottom plates together temporarily are removed. Next, place your wall studs between the pieces. Start by nailing your plates to the ends. Then, cut and add shorter pieces to make the window opening. Each joint should be secured with three 3 1/2 inch nails. To build insulation into your floor, you can add a second bottom plate on the wall to raise it. Now gather some willing volunteers and get ready for the wall to be lifted into place.
It’s an exciting time, but you will need to have a few tools in order to make it a success. To align the wall’s orientation, you will need a framing tool and 3 1/2-inch nails. A sledgehammer weighing 8 to 10 pounds is also helpful. With a few helpers, raise the frame and then push, pull, and pound it into alignment to the edge of your floor frame. Use your level to align the wall vertically (plumb). Next, drive two nails into each space between studs on bottom plate. These nails will extend into the floor boards or header.
Your wall is now secure but not strong enough. You can brace it with long pieces of lumber that extend to the ground. (You’ll take them off later so make sure you use the good stuff). Next, repeat the wall framing process on the side walls.
Once you’ve finished framing the last wall (the one with a door), raise it and check that all walls are straight and straight. This can take some time so don’t move on until you are satisfied with the detail. To ensure that the walls’ top edges are straight, use taut strings (just like you did when assembling your floor frame). Once you are satisfied with the cut, apply another layer (2-by-6s) to the top of your existing top plate. These pieces will need to be arranged in a way that overlaps the wall segments. (See “Post Top Detail” in the bottom left corner). However, there’s a second detail you need to consider first.
Our Post Top Diagram demonstrates how two 6-by-6s (or log posts) should be installed. They should extend from the top corners to support the porch roof. Start by attaching two 6-by-6 vertical posts at the front corners. Next, place three horizontal 6-by-6s on the top, extending to porch posts temporarily supported with props of lumber. Once everything is in place, attach a second 2-by-6 topplate.
At this stage, you will need to raise the four walls of your cabin and add a 4-foot extension from the cabin’s back wall. This will support the porch roof. The roof fits exactly over the porch and walls of the cabin. Here’s an idea: You can use 12-inch spikes to attach large framing post, such as the 6-by-6s mentioned above, but you must drive them into pilot holes. Spikes don’t have the strength to withstand shear loads, but they are strong enough for holding one piece in place.
Wall planks are my favorite siding option. They look great from the inside of your cabin. You can choose plywood or oriented-strandboard (OSB), wall siding panels if you’re looking for low-cost siding.
Roof Framing
There are many ways to frame your roof. However, if you want to create loft space, there are a few things you should consider. Roof pitch is the first. The 12:12 pitch works best for both aesthetics as well as efficiency. This means that for every 12 in horizontal run, the roof will rise 12 in. This means that the slope is 45 degrees from horizontal with a 90 degree angle at the peak.
Your cabin’s slope is made up of rafters. It is the most difficult part of building your cabin. That said, if you tackle the job with care — checking for accuracy early on — you’ll succeed.
First, take a second look at the Rafter Detail diagram. This shows a side view showing the rafters that you will need to build. There are 34 total rafters required. These include 30 that span the cabin and two additional pairs that extend to create overhangs at the porches and rear walls. If you intend to insulate, 2-by-6 rafters are an option. However, 2-by-8s should be spaced on 16-inch centers. The extra wood costs more but allows you to create the angles and notches you need. Similar to floor joists. Check with local building authorities to find out what size wood is needed in your area.
Begin by marking the locations of the rafters where they will sit on top of the sidewalls, ideally atop wall-studs. You can use the same “line and X” marking scheme that you used to lay the top and bottom wall plates.
Next, measure your building’s width across the top of its side walls. It should be approximately 14 feet. There is a good chance that your cabin width across the back and front walls will match this measurement. But it might not across the middle. That’s no problem. One or two spare planks can be used to support the building’s top. Then spike one end. Begin by helping to wrestle the walls inwards or outwards (whichever is necessary to achieve a 14-foot building height), and then spike the second side of your brace planks. These will come off later when the cross ties and the rafters are added. So don’t beat the nails home. You should also ensure that these temporary braces are not in direct contact with the rafter locations. They should not get in the way the rafters.
Follow the diagram to make a pair rafters. They should fit perfectly on your cabin. However, it is a good idea to double-check your cuts using a tape measure. To simulate the ridge board on the roof, attach a piece 1 1/2-inch thick scrap wood to one rafter. Then get some help temporarily lifting the rafters and leaning them against one another. The rafter should meet the top of the walls at the peak. While you work, make sure to check the location of the rafter pair at different locations throughout the building. If they don’t fit in one spot, it’s likely that your cabin’s width is inconsistent.
After you’re satisfied that your pair of test-rafters is satisfactory (and have adjusted their sizes if necessary), you can make the entire 34-piece batch. You will need to add a special feature for 12 of them.
The diagram shows you how to cut notches about 1 1/2-by-3 1/2″ along the interior edges of these 12 special beams in order for them to take 2-by-4 braces. These are the rafters that support the overhanging pair of rafters at each cabin’s end. These notches can be easily cut by clamping temporarily two sets of six timber rafters together, marking each group as a group, and then cutting multiple passes with a hand-held circular cutter. It is easy to remove any remaining wood slivers with a hammer or chisel.
The total length of the cabin’s Ridge is 22 feet (20 feet across building and porch plus 1 feet overhang at each end). This means that the ridge board will likely need to be made in two lengths, each of 2-by-10s. These should be prepared now. Place the joint between them in one of the spaces between the rafter pair. Next, place the ridge boards end to end on top of one wallplate and then transfer the rafter locations onto these boards.
When it is time to raise the roof and ridge boards, only do one side at a time. At the cabin’s end, raise one pair of rafters and another in the middle. This is near the place where you will find the ridgeboard. Fill in the gaps between the walls with more rafters. Use angling screws to make sure they penetrate the board and sink into rafters at the ends. Add the 2-by-4 supports to the rafters, then the four support rafters to form the front and back edges.
Are you worried about the two-part ridgeboard? Don’t be worried. These two halves will be joined solidly by the roof sheathing. If you’re building quickly, I recommend that solid-wood planks are at least three-fourths thick. The underside of the roof plays an important visual role in this cabin. Sheet woods will never enhance the natural backwoods aesthetic. Remember to slap the roof planks in the area where the two intersecting ridge boards.
Now you are well on your way finishing your cabin. Now, add the ceiling joists to connect the cabin at its top. Form the floor of your sleeping loft. Shingle the roof, add doors and windows, and then finish your exterior wall treatment.
Once you have made your small, cozy cabin a part your life, you will realize that it is beautiful.
Cost Estimates for Your Cabin
The following include the frame, rough floors, shingled roof, and exterior siding. However, there are no windows, doors, or windows. All costs are added together to account for miscellaneous expenditures.
Total cost: $6.050 (updated 2015)
Floor assembly: $1,100
• two 20′ 6 x 6 rot-resistant beams (timber rim, length sides)
• two 14′ 6 x 6 rot-resistant beams (timber rim, width sides)
• 27 14′ 2 x 10 boards (blocking, joists and headers)
• nine 5/8″ plywood tongue-and-groove subfloor panels
Walls and porch frames: $1,300
• 50 8′ 2 x 6 studs (walls)
• 15 14′ 2 x 6 boards (wall plates)
• five 8′ 6 x 6 rot-resistant wooden posts (porch)
• one 14′ 6 x 6 rot-resistant beam (porch)
• 21 7/16″ oriented-strand board wall siding panels (wall planks)
• six 14′ 2 x 6 fascia boards (exterior wall trim)
Roof: $3,200
• 34 12′ 2 x 8 boards (rafters)
• two 12′ 2 x 10 boards (ridge board)
• 17 14′ 2 x 6 boards (cross ties)
• four 8′ 2 x 4 studs (rafter support)
• two 20′ 2 x 8 boards (blocking)
• 17 3/4″ spruce plywood panels (roof planks)
• wooden shakes for 550 square feet of roof surface; roof liner, gutter apron
Hardware: $450
• six 12″ spikes (foundation markers)
• 10 10″ Sonotubes (pier forms)
• 10 5/8″ threaded rod anchors (foundation)
• eight 1/2″ x 6″ carriage bolts (header anchors)
• 10 pounds of 3 1/2″ ardox (spiral-shanked) nails (wall studs, floor joists)
• 10 pounds of 2 1/2″ ardox nails (subfloor, roof planks)
• eight 1/2″ x 8″ lag bolts (post tops)
• 15 pounds of 1″ roofing nails
Choose a rock-solid start
From the beginning, you will be challenged to create an outline for your cabin with square corners. To deliver accuracy, a carpenter’s square just won’t do it — you’ll need to use geometry.
The cabin measures 168 inches in width and 240 inches in length, including the porch. Pythagorean theorem (Remember high-school geometry class?These two lines are connected by a diagonal line:
Length = diagonal length = length of one side divided + length of the opposite side squared (then multiply this sum by the square root).
It is 293 inches in length for the diagonal side of Pythagorean triangle if the corner square.
Start by laying out one side of your building, with a spike at both corners, and another spike at the porch corner — that’s three spikes in a row, connected by a string. Next, grab two large tape measure and a few people to hold the tape ends of the spike heads.
Attach one tape measure to each corner stake (you will need help holding them there), then stretch both tapes so that the 168-inch mark of one tape intersects with the 293-inch mark of the other. The location at which this happens should be the one that is on the other side of the cabin. Place a 12-inch spike on the spot. You can repeat the process on the opposite side. Double-check that they are the same length.
If you’re building on rock, mark the corner points of your cabin footprint with a strong felt-tip marker. Next, rent a hammer drill. Boring holes in rock is a great way to create anchor points for the strings that will define the walls of your structure. Bore large holes. Next, tie a mason’s string to half-inch-wide bolts that are 6-inches long and slip them in. Bolt size is not important because they will just drop into the rock’s oversized holes.
Exterior Options
The exterior wall treatment that you choose for your cabin is very important. It sets the tone for how it will look and how much maintenance you will have to do over the years. You can make the Exterior of Your Cabin from wooden shingles, boards, battens, or wooden panels. Before you choose the material for your cabin, make sure to research the pros and cons and find out which one will be easiest to maintain.
Cedar shingles are a great choice because they look great in rural settings, last many years, and are lightweight. Cedar shingles are a great choice for roofs and walls. However, they will not live up to their reputation for being durable. If you have the opportunity to hand-split cedarshingles, they are ideal. However, commercially sawed cedarshingles can also be used.
Do you intend to install stone and brick yourself? Windlock asphalt shingles can be installed on walls to save you time and money. They are interlocking physically, so you can install them vertically without any flapping like regular shingles. Even if you don’t get to the masonry, they look good by themselves.
Board and battens, or 4-by-8 wood panels, are low-cost options for exterior siding. These two options are simple to put up and look great for a while. They can get shabby with time if you don’t take the time to refinish them.
Cabin Kits Many people long to build a cabin or cottage with breathtaking views. Cabins aren’t just for wilderness living. You can use them as a guest room or artist’s retreat, or even as a small office.
Below are the cabin kit manufacturers. They are divided into three construction types: panel, frame, and log. Most kits include the materials needed for exterior walls, interior walls studs, roof, floor and trim. They also include windows, doors and fasteners. The kits do not include foundations or insulation. Shipping costs are not included in these base prices.
Before you decide to buy a cabin, be sure to carefully read the company literature.
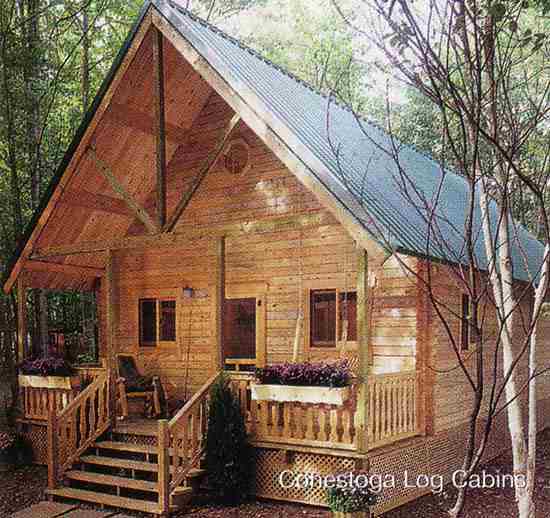
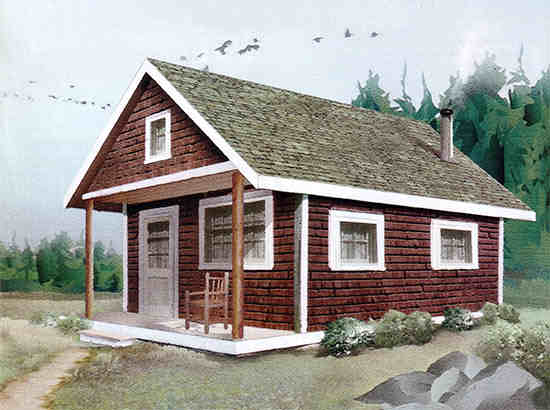
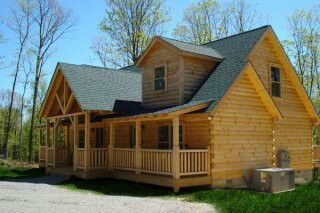
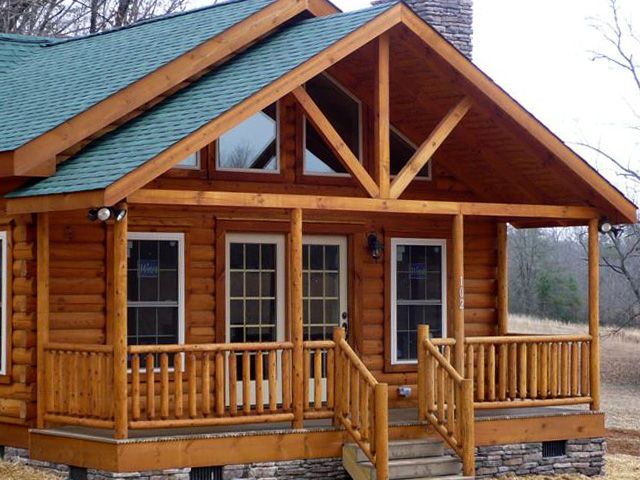
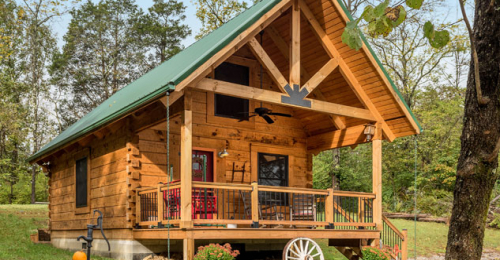
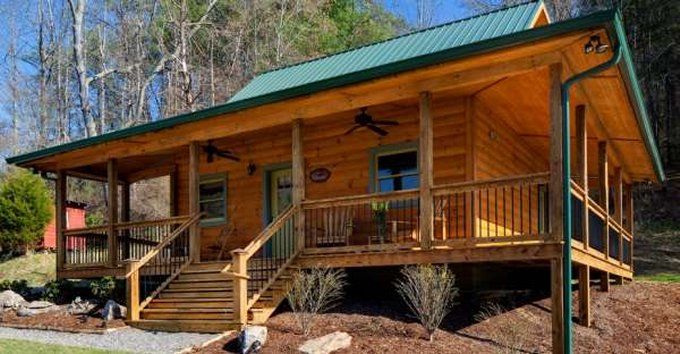
Photo Gallery